Thursday, January 31, 2008

Go Vintage!!!


Hey everyone...Kristy here!

So the other day I sat down to make my hubby a birthday card. As I sat pondering the choices of papers that I could use, nothing in my "new" stash was really speaking to me. So **gasp** I decided to go digging through the "vintage" papers. And what did I find? I found that I had a GREAT time using up some of my old stash. For whatever reason the pressure of making some of the new lovely papers work had disappeared, and I had a great time working with a little bit of ancient KI paper.

Okay, so now it's time for a little chat. You KNOW you've got those papers that you just can't bare to let go. You've been hanging on to them for....oh.......6 years? Guess what scrappers....my guess is if you haven't used them by now, you're not gonna!

So how's about a challenge for you! Here's the hard part....I know, I know....you're saying to yourself, "but I can't use it! I can't buy it again! What if I NEEEEEEEEEEED it one day! Well, I'm happy to report that TODAY is the day you're going to fill that NEEEEEEEEED! Sit down. Start digging...no...keep digging...deeper, deeper. Get to those papers that have an inch of dust sitting on them. There! Stop! THOSE ARE THE ONES!

Your challenge is to show me something VINTAGE! On Feb. 15th, I'll draw a random winner to receive a RAK. Could be new. Could be vintage. Could be both! You'll just have to wait and see!

HAVE FUN!

Monday, January 28, 2008

Talk about Inspirational!!

Natalie here with a MoJo booster!
I was shown the COOLEST magazine today! I've never heard of it, but then I am a bit sheltered. Maybe there are some of you out there that haven't heard of it either.
It's called Cloth Paper Scissors. The Jan Feb issue came into my office today, and it is FULL of cool stuff. Maybe not everything you would copy exact, but the ideas in it are AMAZING!!!

If you like the idea of creating custom artwork for the walls in your home, and you're a crafty gal like me, I'd recommend you check it out.

I'm not sure which stores carry it, but I do know Michaels do.

If any of you pick it up, and find inspiration, please post and share when possible!!

Me, I'm wondering how my life is ever going to be long enough to make all the neat things I want.

Free Digital Kit


Wendy here, just wanted to share a little Valentine's digital scrapbook kit I put together. You can use it for digital scrapbooking or paper scrapbooking (just print out and use). I'd love to see your creations if you do use it. I know I still have some more emails to get to for the free frame I offered and I will get to it...this is easier though, just go to the link below and download (I'd love for you to leave me a comment too!) Happy Scrapping!
Wendy
FREE DIGITAL KIT DOWNLOAD LINK

Friday, January 25, 2008

Cricut Expression!

ohhhhh, how I love this little (um, ok big) little scrappy machine!! I have made some files, and if you have an expression, and a few cartridges, then you can share in my joy.
Most of these use either George and basic shapes, accents, or basecamp. I hope that's it, but it may need something else. I guess if you like it well enough, then you will have to buy another cartridge huh? lol.


OK, here are the pictures, and the links. All of them are on 12 x 12 mats. (sorry little bug users, maybe you can download them, and use a portion) Anyway, I have cut from all of these, and I think I got the bugs (no pun intended :D) worked out. Hope you enjoy! :D


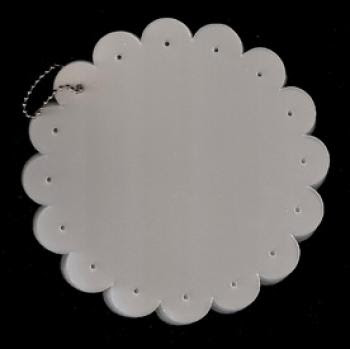
Scallop Mesh File


Flower Mesh


All Boy Bubbles


Number Mesh


Alphabet Mesh

But, I think my favorite is the Number mesh-- but then again the flower one is pretty cute. Hope you can use them! Love ya! Shellie

Wednesday, January 23, 2008

Show me the LOVE! :)


Yes...Valentine's Day is fast approaching, so I wanted to get you all started on your handmade Valentine cards! (Oh...and I see Melissa is thinking along the same lines, here...love her Valentines in the previous post!)


Here's one to hopefully inspire you ...(and if you peek down to the next post, Melissa's cards will make you oooh and aaaah like crazy)...I can't wait to see your Valentine's Day creations! Please post a link here, so we can all share the love!
HUGS AND KISSES,
Dee ;)


Tuesday, January 22, 2008

Love affair with colors and shapes...


Let yourself be inspired by your favorite color and a favorite shape or symbol. Since Valentine's Day is fast approaching, it's a great reason to let your creativity flow using hearts, and the color red. Since this is one of my most favorite colors to design with, I've found myself adding in a couple of other colors and creating fun color combinations---and then of course I'm enjoying using hearts galore. Nothing new and earth shattering I know, but it makes this time of year even more fun!
The first card emphasizes the sweet Heidi Swapp chipboard heart and the color red. I wanted to bring in a vintage touches by aging the paper, adding some glitter, and also tea-dyed trim from Melissa Frances. I also used watercolor pencils to soften the rubon from Melissa Frances as well.
I love the brightness that turquoise adds in this color combination. This was a card I created using a sketch from Sketch This Cards blog.
The second card has some fun foam stacked hearts from American Crafts. I love the rich pinks coupled with the turquoise. It creates a playful color combination.
The third card uses a sketch from another one of my favorite sketch blogs: Card Positioning Systems. I added cream, chocolate, and a bit of turquoise to create this color combination. I used paper and die cuts from My Mind's Eye which makes it so easy to whip up a quick card for someone special.
I would love to hear what your favorite color combinations are and to find out your favorite shape or symbol. There are so many kits, papers, and embellishments available that center around holidays, that it just makes paper-crafting that much more fun!
Happy Heart Day!
Melissa Phillips

Digital Freebie!


Hey everyone, Wendy here....I felt so guilty that I wasn't able to post so I did up a very quick, (but cute) digital 4x6 frame for Valentine's Day. You can use this for scrapbooking, cardmaking, etc. It's a psd file and I will be more than happy to email it to anyone who would like to use it. Just leave a post with your email address or just email me at Lamram4@yahoo.com and I'll get it right out to you. If you do use it I would love to see your creation. I'll even send out a prize pack to one "lucky" winner from all the posts/creations that I see. This frame is usable with any Photoshop software. I hope this little frame inspires you and helps get you "outta that funk"! Have fun and happy scrapping!

Sunday, January 20, 2008

And The Winner Is...

Jana!! I want to say thank you to everyone who participated in my Easy Peasy Mini-album challenge! Jana, please send your mailing information to scrapwithrobyn@aol.com ! Thanks again!

Wednesday, January 16, 2008

{ Sticker-Gripper }

Hi Girls, Natalie again.
You’ve probably heard of the “Clip it Up”.
What if your Clip it Up didn’t spin or take up desk space? What if it just hung under a shelf?

I’ve seen online where people have constructed their own Clip it Up to save money, and I’ve made one too! I’ve done it so cheaply, you won’t believe it, AND I’ve made it fit MY space. (I can even slide things under it like my paper trimmer, my pink tidy tray, or the current layout I’m building.)


History:
I put up some shelves on the wall in front of my scrappy desk last summer to keep more things in front of me and not put away in my closet. (I have to walk to the closet, 4 whole steps!!) When I decided I wasn’t getting enough on the shelves, I went to the dollar store and bought some containers I could stack in 2’s. They were $1 for three!!!

I built the 1st shelf shorter than my 2nd shelf because I had something sitting on my desk. This turned out to be the best thing I could have done because I’ve moved it and have a perfect spot for my own Clip it up, which I’m calling my Sticker-Gripper.

Here’s what I bought, and where:
$0.60 Two rubber grommets (hardware store)
$0.75 Three screw hooks (hardware store)


$1.00 One pack of 200 paperclips (Kmart)


$1.15 Half a pound of spring washers (hardware store)


$3.98 Two packs {50 count} tiny clothespins (JoAnn’s)


$2.00 One ¼” dowel (this is approximate cost, I already had it, but they’re cheap and tend to be 3 ft. lengths.)

When I include tax, my total is: $10.09!

I’d better give you some instructions.

GRIPPERS:
Side note: The clips on the Clip it Up come off, mine don’t, but I will show you how to make ones that will if you prefer them removable. I think the washers are just a little more hard core. Nothing is going to become tangled this way.

*Push a paperclip onto a washer. (If you are wondering why I didn’t use flat washers… the hardware store I went to didn’t have flat washers with a hole big enough for a dowel. They had all sizes of spring washers though, so I bought them.


*Encourage the slight bending of the paperclip back into paperclip shape.

*Straddle a clothespin on the paper clip on the side where the paperclip has an end.


*Thread the paperclip through the spring on the clothespin and slide the pin to the first bend.


*That’s all.

Now for the removeable one. This would be even cheaper, cause 1 pack of large paper clips, qty 75, cost me $1.29 (w/o tax). Add that to the pieces you would still use, clothes pins, dowel, hooks, grommets, and tax… you get $7.80. Just remember, these are not so hard core, and don’t slide as well, but they lift on and off.

*Open a paperclip completely and the smaller section will snap off. If it doesn’t immediately, you could just cut it off with pliers.
*Disregard the small piece.
*Using pliers, cut off ½” from the straight side, and curl the already bent end even further.
*Slide the clothes pin on the straight side and down to the bend.


*Hang it up. This one is perfectly perpendicular to the wall. Because the others weren't they were forced to sit on an angle once stacked next to one another. I'm happy with the angle.


ROD:
*Cut a length of dowel to size and spray paint it to coordinate with the shelf it will hang on.

*Drill pilot holes for the screw hooks under the shelf and near the front. Ensure they are the same distance from the front edge of the shelf.

*Screw in the hooks.


*Slide the painted dowel through the left and middle hook. Thread on ½ of the Grippers you made, slide it through the right hook and place a rubber grommet on the end.

*Slide the painted dowel further right, releasing it from the left hook, and thread the other ½ of the Grippers.

*Slide it back into the left hook and place a rubber grommet at the left end.
These rubber grommets will stop the dowel from moving anywhere. Push them right up against the outside edges of the hooks.


Yes, it’s that easy!

If you don’t have a shelf to hang a Sticker-Gripper from, make one! I made mine by screwing blocks of 2 x 3 to the wall and then screwing a 2 x 5 into the tops of the blocks. (the 2” measurement on wood is really 1 ½”. Must be a guy thing) I spray painted my wood black before putting everything up. (My favorite shortcut… spray paint!!) Notice how I screwed to my wall on one side of the block, this made it easy to screw the shelf down into the other side of the block. Nothing heavy is going to live on mine. Maybe if you had heavy stuff, you’d want more than one block at each end of the shelf.


Just a short recap. The Sticker-Gripper I made was $10.09 including tax. The Clip it Up, costs $59.95 for the bottom tier, $34.95 for the top tier, and the clips are $6.95 for a bag of 25. That is not including any tax if it’s applicable.

I say, when there’s a great idea out there, and you have the ability to make your own and save money, DO IT!!

Have fun Girls!!!

Friday, January 11, 2008

Oh My Fabric!!!

Natalie here.
I went to JoAnn’s yesterday to buy some fabric for a tablecloth, and I found this lovely Gem! It was on a sale rack for $5 a yard, and there was only 2 yds. Not enough for my table cloth (need 3 yds), but can’t you just imagine how awesome a table setting you could have with a decorative base like this???? This color combination is so IN for me right now, and the sequins!!!! It makes me smile to look at it! (The second one I took with a flash, so you could see the sheen in it.)
Maybe I need to do what Teri did and make some cards using this as my inspiration. Oh, and obviously I did buy it, but I don’t yet know what I’m going to make with it. I don’t have a room in my house with orange and turquoise. Plenty of brown…. but I don’t think I could incorporate this. If I could, wouldn’t it make a cute curtain for a small window, or a few throw pillows for a bed???

Maybe a skirt???? I’m going to hang onto it until I’m positive I have the right idea. I’ll keep any scraps to stitch onto some cards. The colors are a bit Fall, so maybe by then I’ll have scraps for cards.

Ooooooooh Fun!!

The fabric I settled on for the tablecloth…. Well, I had to buy two because I couldn’t decide and it was on sale for $3 a yard. They are both brown, one is kind of an olive brown, and one is a warm caramel brown, they are both a fun-to-touch type of faux suede. Strange for a table cloth I know, but it has this sheen to it, and it will be beautiful.
Since the room with the table has lots of olive tones, I think I’ll use that one and use the other for some pillows.

Tuesday, January 8, 2008

Altered Art Journal


Hi All!!!
Jen here...

Sometimes I get caught up in creating things because I have to and this takes some of the joy out of it. I decided to start my art journal for a release of my fun side. In my journal I will only create things for fun…no assignments…no rules to follow…just whatever my little old mind can dream up.

I made my journal out of a deck of playing cards. Who could ask for anything cheaper than that? I don’t feel guilty when one of my ideas doesn’t work and I have to throw it away! I punched holes in the cards and bound them together using a simple ring clip. This is great because I can easily remove the pages to work on.

I love the size of these cards. They’re small enough to finish quickly, while my idea is still fresh in my head. I don’t have to worry about needing a lot of product to finish them. In fact, I’m finding uses for all those little left-over bits and pieces that I’ve saved for ages.

Right now, my creative muse is playing with different color combinations and vintage photos. Who knows where I’ll go from there? All I know is that I’m having so much fun creating these pages, I don’t want to stop.

Sunday, January 6, 2008

I love my cell phone. :D


ok, I just wish I were a better picture taker. This mind you is a proto type. I have not mastered the mod podge on the plastic yet, but I have ideas! I think I am going to get a clear case, and do it on the inside instead of the outside. This picture shows flaws that are not noticeable in real life, lol. Anyway, just an idea.


I love all the cute cases they have available for cell phones, but I wanted an orginal! I love the basic grey phoebe line, so viola- I just coverd a case that was used and worn, and I got a whole new look. The gems actually stay, which I was surprised since i stick it in the side pocket of my purse. :D thanks for looking.
Shell

Friday, January 4, 2008

Easy Peasy Mini-Album


Hey, everybody! This is Robyn here to share something that's super-easy, fast, and fun to make! I'm always eager to start fresh at the beginning of a new year, but I wanted to make something to help me remember some of the wonderful times I had in 2007! I wasn't in the mood for a long drawn-out project that would take me hours to do. I wanted something that was gonna be quick, easy, and cheap to make, without using a ton of product. I also wanted to focus on my feelings about each event, so I did something I never do when I'm scrapping...I journaled in my own handwriting! So, here's what I came up with: A five page mini-album using cardstock, 2 rings, eyelets, stickers, a pen, ribbon, rub-ons (which were created by our own Dee Gallimore-Perry!), a button, and a flower! The only thing I did that actually took a little time was to stitch a border around each page. Even with the sewing, it still only took me about 1.5 hours to complete the entire album. Now for a mini-album that's great timing!

Now for the fun part!
CHALLENGE!!!!
I'm challenging you to make an easy peasy mini-album of your own using a minimum amount of items! Don't buy anything! Only use things you already have in your stash of scrap materials! Your album subject can be whatever you like! Post a link to it here and you can win one of these two Sheer Mini-Albums by Maya Road and my new favorite stickers from Basic Grey's Two Scoops Collection! I'll select a winner on January 20, 2008 from the entries! I'm looking forward to seeing what fabulous creations you come up with! Have fun and Be Blessed!!


Tuesday, January 1, 2008

Sketch it in 2008!

HAPPY NEW YEAR!!
Wow! Another year has zipped right by and we're on to the next one already. Are you ready? I think I am. I'm ready to be more organzied, more daring, more energetic, and more creative!!!!

However, I'm sure that for some of you the start of a new year (or the start of anything) can be difficult to just get going. I often find that cleaning up my studio helps get me into a creative mood because I have a clean desk to work on once again. Sometimes purging some of my supplies (because we all know that we have waaaaay too much! ;)) is another great way to get that mojo back ... because we now have room for some new products to give us inspiration!

I know for me the best way to get my creative juices flowing is to sit down and make sketches in my notebook. Maybe it's because I'm such a visual kind of person. Now, I admit that I'm not the type who can just sit & make up any kind of sketch. I usually have my photos picked out and then start from there. I may end up sketching several designs before something really clicks. But when it does ... IT DOES! And then I can't wait to get started!

It has been a few weeks since I have worked on a layout because I have busy working on class projects for the month of December (which included NO layouts) so this past week I had to sit down with my sketch book. I needed to work on a layout for my LSS. We were given a kit of paper, buttons, die-cuts and a journaling topic to work with. So that was what I had to work with plus the photo that I was going to use. After a few designs this is the one that I finally went with.

And here is my layout that I created for my LSS using this sketch.
As you can see from my sketch I didn't follow it exactly. That's the beauty of a sketch. It's just that. You have complete freedom to do whatever your heart desires! Instead of having a circle with journaling behind the photo I just put the journaling on a rectangular piece of patterned paper.
I would like to encourage you to try sketching your layouts & projects - especially if you've never done it before. In fact, start tomorrow. Go out and buy yourself a little sketch book & a fun pencil (with eraser! ;)) and start drawing away! Then have fun creating your pages!
Wishing you a Blessed & Happy New Year!
~ Cari